THOUSANDS OF FREE BLOGGER TEMPLATES �

Friday, June 29, 2012

Photo Friday: It isn't as terrible as it could be...

I'm going to start this post assuming that most people have seen some news this week... either in print or any coverage nationally.
Which means you have seen that the forest fire I briefly mentioned blogging on Sunday night turned quite disastrous this week. After some growth Monday, we all put it out of mind and mostly went about our business on Tuesday.
But about 3:00, the winds picked up and the fire went from a couple miles away (from the northwestern most edge of town) to in suburban neighborhoods and destroying many houses in a very very short period. Over 30,000 people were evacuated in about an hour, giving them only a few minutes to grab what they may need from their homes and leave. Now that the fire has retreated some, the devastation includes 346 houses on 34 streets, a well known historical site called the Flying W Ranch, and one man's life.
Should you have not seen the pictures, you can google the Waldo canyon fire. I am not going to re-post any here because they are upsetting.
When my family first moved to Colorado, we lived in that area of town. I know many people who live over there still. It was hard to see the devastation and think of all the great memories we made there.

I've also been feeling a little cabin fever ish this week, since the smoke affecting my lungs has kept me indoors.

But this morning dawned bright and clear with very little smoke on our side of town. I was headed back into town at sunrise after taking Pete to the airport. And taking a look at the wonderful day, I decided a walk was needed. I grabbed Ursa and we headed to the nearby dog park. Below are pictures of our "adventure"

The sun peaking into the neighborhood. Pardon the power lines, I live in suburbia...


Pikes Peak. 

Ursa is looking forward to the park. The dog has been cooped up too with owners trying to avoid smoky conditions.

Walking path over a stream nearby. I love all the greenways in our town. They are especially nice since most of our big parks are closed until the fire danger is lower.

Wildflowers


North side of fire effected area from blodgett peak to the rock quarry (AKA: scar on the mountain). You can't tell from the picture that the range is quite a bit more black than it would usually be in late June.

South side of fire affected area. If you remember my post from Sunday and the picture I took Saturday, there was a giant plume of smoke coming up in what would be just about center of this photo. 

Southern side of Pikes peak with Garden of the Gods at the left most edge of the photo. I love how those rocks just glow in the early morning light. 

Garden of the Gods. I don't have much zoom on my camera, so that is the best it gets from the east side of town.


Please do not think that I am trying to downplay the devastation of this fire. It has been so unfortunate. I hate seeing our mountains on fire, and the fact that 346 people have just lost their homes is so sad. But, after looking at pictures that look like the world is downright ending and hearing endless errors in the news reporting, I wanted to show my out of state friends and family what we see. Our town is still mostly here, mostly intact. That which has been lost will be rebuilt. Those that have been left homeless are seeing compassion and community that many of us probably didn't believe still existed in this day and age. The loss of life has been minimal due to quick decision making by our leaders and the officials working on this fire.

Furthermore, as calm as it looks, there is still a fire actively burning just the other side of these mountains. And there are many more burning in other parts of Colorado. With our record heat, record low humidity and dry winter, the conditions are ripe for much of our beautiful state to be dealing with fire for all of fire season (until the weather cools).


Now, on to the rest of our walk. We stopped by the dog park, which was... for the first time that I have ever seen, empty. Apparently 6 am on a Friday is the time to be there, (or not there depending on how social your dog is. Mine is social. But not to worry, there were still plenty of balls for her to play with so she did not notice)


I've never noticed this sign before. It cracked me up. No funny business at the dog park canine friends!

Once Ursa chooses a ball, she will NOT play with any other. See the nice new bright tennis ball on the left. Yeah, that isn't the one she insisted on playing with. The one on the right, pretty much the ugliest tennis ball I've ever seen: that is the one she wanted thrown. And she WOULD NOT go after any other.

The great thing about a ball camouflaged by its ugliness is that fetch becomes a game of hide and seek. And since she would not use any other ball, I got breaks in between throws while she searched for the "correct" ball.

Again towards the mountains from east side of park

Better view of Pikes Peak from dog park

Ursa, relaxing in the sun on the deck after our walk.

A delicious healthy breakfast of yogurt and fruit.

And now, since I got up at 2:45 this morning to take Pete to the airport, I'm off to have a nap before work. 
Take care everyone, crazy things happen and it is always hard to predict when...

Lia

Thursday, May 31, 2012

Crazed cleaning: car cleanliness

Well, it has happened...
My beautiful pristine car just purchased (very lightly used) in February experienced its first... mess.

When we bought the 2009 rav4 a few months ago I was SO proud. It is only my third car ever, but that mostly just says that I hate car shopping. Because, for the first four and half YEARS of our marriage, we were a one car family. So here we were, not just a two car family but also possessing a NICE car. (the previous were a 1991 honda accord and 1998 jeep cherokee. Neither were awful but, dated with high mileage and high mileage issues.)

And I was determined to keep it looking nice. Something about driving off the dealership with that fresh dealership detail made me strive for a spotless car.

But, we do not have a good reputation with this. Pete and I are both awful about leaving things in the car. We aren't great about cleaning out trash... and if our one car was any indication, the odds were against us.

So I looked and looked for some strategies to help us. And I headed to the store to find a container to use as a car trash can and looking for some cleaning wipes, so we could do quick cleanups on the spot.

I found a plastic cereal container to use as a trash can. I added a piece of inch wide "hook side" of "hook and loop tape" (the scratchy side of velcro) and stuck it to the back of the passenger side seat. Its been great. It is easy to reach back as the driver or passenger to deposit gum wrappers, empty drinks, etc into the trash. Then, when I fill up for gas, I dump the trash out of it!
I haven't taken a picture of my own, but here is where I got the idea:
http://www.bhg.com/decorating/storage/projects/organize-your-recycling/?page=14

Better homes and gardens shows theirs next to the center console. I thought this could work for my car too. But I wanted to be able to velcro it in place so it was not moving around during car trips and I could not velcro it in this area of my car. My center console area has a weird angle issue for this.

I started looking at cleaning wipes and was disappointed with what I found. #1, expensive. #2 (and more importantly, I had just been working towards making my cleaning in the house chemical free. I've been eliminating chemical ridden household cleansers from our house with homemade alternatives. I have been very successful with this and feel much better about cleaning without all the unpronounceable chemicals. I could not go back on this commitment for my car! If anything because it is a smaller space with less ventilation than my house.

I had been reading about homemade wipes through blogs on pinterest and thought... maybe I could come up with something that would work for the car.

I don't know why I had been reading about homemade wipes. I was reading specifically about baby wipes and I definitely do not need those. But I had read about some recipes and had some ideas.

I picked up some paper towels, a container and some castile soap in peppermint.

The container I picked looked like this:

Its a sterilite container that holds 6.2 cups. I picked it because I was looking for something about the size that I could put a toilet paper roll in.
I picked the blue "shop towel" paper towels from the automotive department because, it seemed like they would be less lint-y, and would hold up better. And since I was thinking we wouldn't have too many car messes to clean up, I thought we would need the product to stand the test of time. And they were not much more expensive than a good roll of paper towels


When I got home, I mixed up a solution of
1 cup water
1 TBSP liquid castile soap
3 drops tea tree oil*

*I like to add tea tree oil to my cleaning products for its antibacterial properties. Also, it has a very clean, and green smell to it.

I cut the shop towels in half so that they would fit in my container.I stuffed them in the container. It was a bit of a tight fit but I knew that would be fine once they were soaked in solution.
Then, I poured the solution over the towels, making sure to disperse the cleaning solution evenly around the container. At first, the solution pooled in the bottom of the container, but after a few moments, it had soaked into the towels.
Then I sealed up the container.
I put it into a storage compartment in the back of my car and forgot about it.

Until yesterday. We had gone camping Tuesday night and then packed everything up to head just down the road for some rock climbing with a couple friends. Our dog, Ursa, LOVES camping.


However, she is a high energy dog and has been known to get... over stimulated. Throw together a camping night, a whirlwind of outdoors, a hot day, probably not enough water, and a nap in the car and what you get is a large puppy vomit mess.
A 90 degree day is no time to have this sort of mess in your car. So, I was determined to clean it up as absolutely best as possible before our two hour drive home.
I scrubbed and scrubbed with a paper towel and half a water bottle when suddenly... it dawned on me!
THE CAR WIPES!
I unpacked the car enough to get to the "secret" compartment where they were stashed and pulled them out. And then I scrubbed at the carpet like the world depended on it.

When Pete came back to see how things were going fifteen minutes later, you could not even see a spot. After scraping as much as I could out of the carpet, I simply splashed some water onto the carpet and scrubbed at it with the wipes.
No lint-y mess. No stain whatsoever.

It was magical. And my (slightly used) new car is no worse for the wear. We all got home without suffocating or gagging. Though sick puppy opted to climb up on top of the blankets and sleeping bags to both avoid the puke spot and be settled into something fluffy...

We'll even call the trip a success. Because family camping trips are always likely to get a bit messy. Avoiding as much mess as possible and cleaning up the rest of them is all you can do. And so far, none have gotten to us so bad to keep us from going out for another trip.

What cleaning shortcuts have you put together and forgotten? What has gotten you out of an unexpected mess at an unexpected time?


Wednesday, March 21, 2012

Project days

Just like everywhere else, its hard to get everything done around here that we want. And we've had the habit of talking about doing something, particularly projects around the house and cleaning / organizing for weeks and weeks and never doing it. Since I am not the tidiest of people and my husband is well... even less tidy, its always been a struggle. Most recently, our few good habits have gone out the window and our status as responsible adults who could take care of our home was quickly diminished. It was getting embarrassing. 

But more recently, we have been much more disciplined about this. About every couple weeks or so we have been having a day just for projects... making things easier, more accessible, more organized, and easier to keep track of.
And its been a ton of fun! Our house is getting cleaner and more organized, we've built some things to make life easier...

Slowly we are making progress on all those things we meant to do. I will keep you updated as the projects continue with posts around the following subjects:
Operation Organization
Crazed Cleaning
Delightful de-cluttering
Useful Up-cycling
       We'll make our way through every room, closet, cabinet and cranny to see how far we've come and how far we have to go. I expect it to be a great series for anyone else who just wonders to themselves: "How has it gotten this bad? Where do we start?"

Here's a sneak peak of the type of things we've done and I will be writing about soon:
In recent weeks, we have created a menu planning system, organized the car, started a chore cycle, built two different utilitarian carts, and slowly but surely: we are seeing progress!

I hope you will join me in the coming posts to hear about all the great things we are doing to live a more organized, clean, and easy house life.  

Monday, February 6, 2012

Cheaper than therapy?

Well fellow crafties...

I've discovered yet another.

Almost a year ago, one of my husband's aunts facebook messaged me about a new craft I "JUST HAD to learn." Well, I had plenty of time, being on medical leave from work, but we never met up, she went on a fabulous trip to Italy and it was nearly forgotten.

But when hanging out with one of the other aunts, I mentioned it and she explained it. She couldn't remember the name but showed me an example by bringing out a craft book that she had called, "Softies." Cute projects, amazing work... but I wasn't in a place where I wanted to learn about a craft that revolved around making fancy stuffed animals (and from the particular book I had seen, that was my impression). So I never got around to asking more about it.

But as my eyes have been opened to all that is craft via pinterest, I have become increasingly more interested in the number of super awesome projects revolving around felt.

Skip ahead to last night. Its the super bowl. I'd been in a funk for a few days. Long work week, first cold I've had in forever (and it was a narly one too), and some other things going on, and grief just crept back in. I sat next to my husband in a bar stool, staring at the game, thinking about 1000 other things, none of which deserved the time, even if it was as an alternative to football.

Then, aforementioned aunt walks out of one of the bedroom with what is obviously craft supplies. I take one look at my husband, the game, and say, "There's a craft involved, gotta go."

And so began my lesson in needle felting. And it is kind of... well, we made little animals. I'm not one for "knick knackery" (as we call it around here), and these animals didn't really DO anything... so I was skeptical that I would be all that impressed.

BUT! Then, I learned and practiced the process involved in needle felting.

Its a very complicated thing. You repeatedly stab a barbed needle into a ball of wool and it forms itself into a tighter and tighter form allowing you to add shapes, mold, and sculpt until you get what you like. Actually, it does require a bit of finesse. And you certainly do not want to stab yourself. However, it is simpler than you would imagine reading directions or looking at finished pictures.

And its monotonous. And a little bit violent. It really helped with the blah I was feeling. Don't read this and assume I was thinking while stabbing, "And this is for not learning the menu!" because, honest to God, I was not. But, there was something so therapeutic in stabbing an object over and over again only into to form it into something completely new and different.

I don't know that I can explain it any better than that. Except to say that of those of us who tried it, the other person to really get into it was an elementary school teacher. Someone who deals with far more politics, immaturity, and probably stress than I ever do. But... sometimes I feel like by offering a teenage their first job, I can relate to a third grade teacher rather well. As my mother in law mentioned though, I may think my employees are at the same level as third grade teacher, but then I still have to PAY them. So there is that.

Here is a picture of my creations:

Bunny. Cute, but that's about it. And two bumblebees I plan to attach magnets for the fridge to.

So, either the repeated stabbing or the fact that I finally created something rather than just sitting on pinterest thinking about things I COULD create... either way. It was a pleasant end to a weekend. And I have to say, it ended with me in a much more pleasant mood.

Tuesday, December 13, 2011

time to play the elf

Well long time no write to dear friends!

I have sorely neglected you over the past month, and for that, I am sorry. It is not entirely my fault.
You see, I had major surgery. And, while I thought that would be a spur of creativity the way my bereavement / c section healing time away from work was in March, I was quite wrong. This surgery was a little more intense with a little more pain.
And, when I gave in and took THE painkillers, I was, well, quite brain dead. I tried to sew... but ended up removing more stitches than I made. I tried to make cookies, but they were pretty terrible.
The inability to craft is even more unfortunate when you see this creativity sparking picture (taken from my cell phone, ha ha)

This is the view from my hospital room. Oh, how I love our beautiful beautiful state. I wanted to create but I was busy with my painkiller induced stupor, visitors and trying to... well just trying to be at that point.

But the other reason I have not had any projects to post is because... THEY ARE TOP SECRET! That's right folks... 'tis the season to not ask too many questions about creative pursuits.

I have been crafting. But as most of the crafting has been centered around gifts not to be opened until December 25, it is difficult to discuss.

One of my most favorite things, I can give you a brief preview. I have, after an afternoon in the craft store been embellishing letters as home decor. One is a gift for my mother in law's boss and another is a secret santa gift. Since I cannot show the whole gift and give away the recipient... I will give you the slightest glimpse.

Both came out just beautiful and I am very pleased. We have finished most of the gifts that need shipping so now it is on to the gifts that stay close to home, IE: 4 more parents, friends, white elephant gifts...

But its all in good fun and holiday spirit!!!

Craft on,
Lia

Saturday, November 12, 2011

My sew throne

Well friends, earlier this week I finished my sewing chair. After some sanding, multiple coats of stain and polyurethane (just realized I have no idea how to spell that word), a new foam pad, some new fabric, and finally putting it back together, it is ready to faithfully serve as the sewing chair for many more years.
I really enjoyed this project. I haven't stained wood before and it was a delightfully easy process. I did use a slightly different product, called "polyshades." It claimed to be a stain and urethane mix.
And, when you see the finished product, you will see that I got what I paid for. The chair is both stained and polyurethane coated even though I didn't go through the usually two step process.
But, the polyshade is a very sticky, oily mess that quickly hardens into a varnished mess. In trying to clean my brush, I stained up my laundry room sink (and had to scrub it with straight rubbing alcohol to clean it up), stained my hands (and they stayed sticky for a few hours too), and still didn't salvage the brush! Not to mention the satin finish is a little glossier than I wanted. I picked up this product for the color... and it didn't turn out as dark as I wanted.
But... this post is to say: the project is done. I am very happy with my result. I will now be sewing in significantly more comfort than any of my former sewing "chairs" could provide (like when I first got my sewing table and used our cooler with pillow on top!).

And it does look fabulous.

Now that the chair is done, I have quite the list of sewing to accomplish for my weekend.
I'm making fleece pajama pants. And then just prepping a few projects to take on my "vacation" (a 3-4 day stay in a post-operation recovery room)

But of course, I'll let you know how they go.
Keep on keep on crafting,
Lia

Sunday, November 6, 2011

No more bag lady

Today was the perfect crafting day. I had a nice little morning time spent with the hubby, the house had been tidied and the broncos game was proving to be worth watching for the husband.

So, I had a couple hours to get a quick project done that had been on my list for a while. A holder for our recycled grocery bags.

We always keep a few dozen grocery bags around the house for the various tasks where they prove useful. And lately, the bags were slowly taking over the cabinet under the kitchen sink. When I tidied under there a couple weeks ago and found mouse poop, I knew it was time for a more organized system.

So today, I built myself a little grocery bag holder / dispenser.

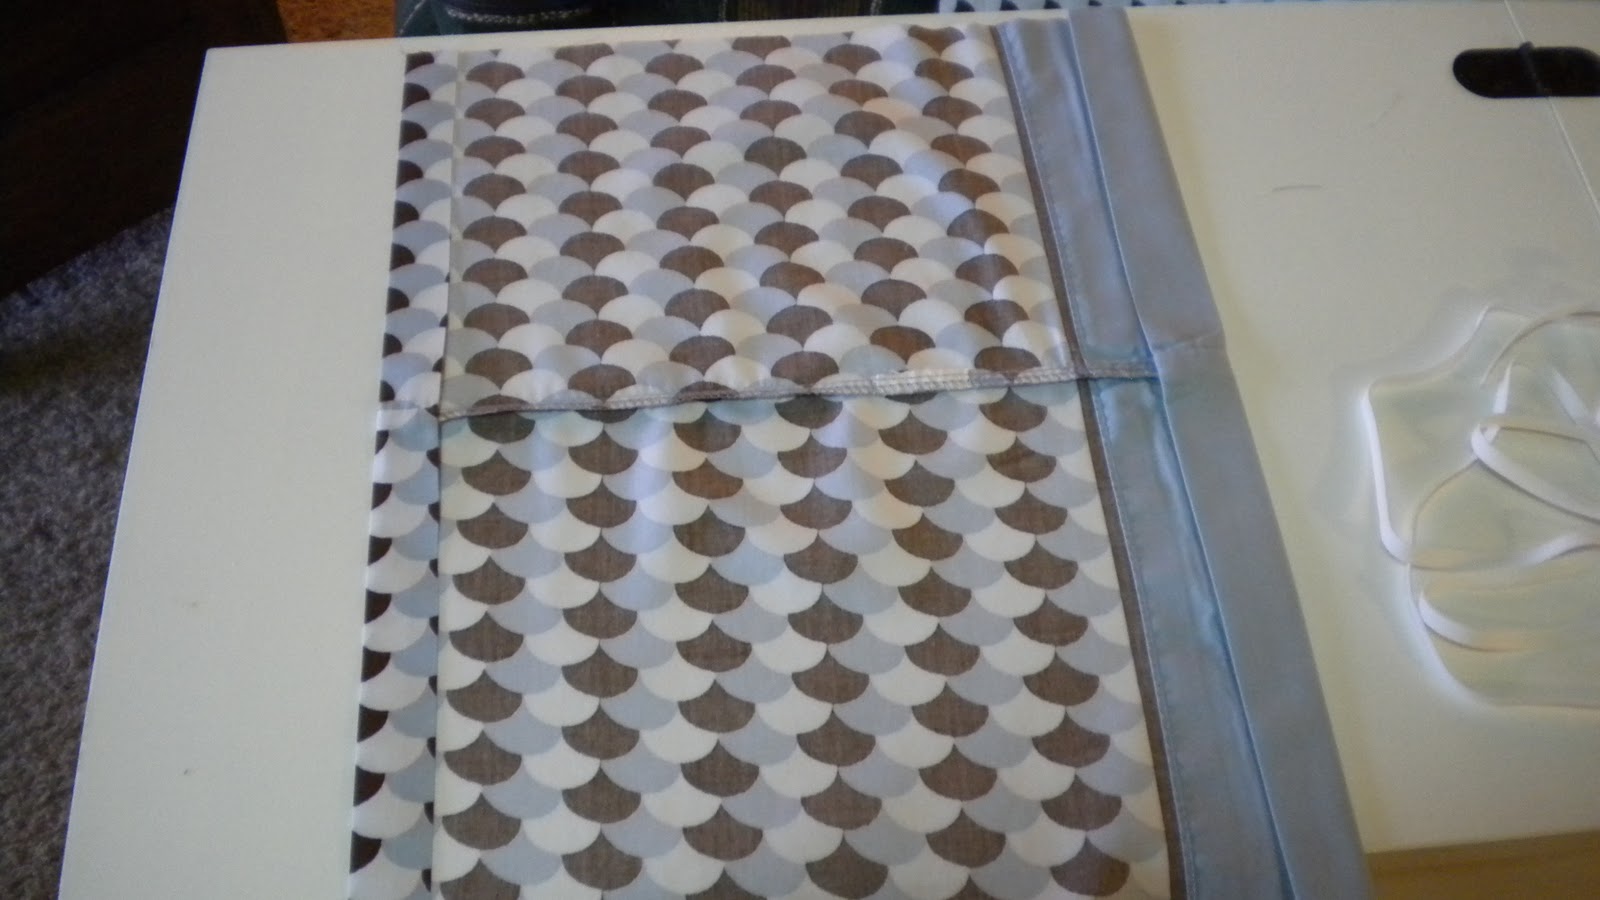
I started with a pillowcase I bought home from the thrift store months ago because I loved the pattern.

I cut out about a quarter from the open side, then pressed it.
I didn't measure at all (since I hate that), but I did go back after doing a rough cut and straighten all the edges. I guess its not technically, "neccessary" to start with straight edges since I was going to finish all of them. But, to be honest, I don't sew in a very straight line, so I like to start with a straight line for reference.

With that taken care of, I pressed a hem about an inch wide onto the top and bottom
My iron and some starch is one my favorite tools when working on a sewing project. It saves a lot of the put the pin in, take the pin out drama.
I sewed these hems along the very edge of the fold so that I had a nice casing for the elastic on the bottom and wire on the top.

Next, I sewed the two sides, right sides together. I started and ended this seam before the edge of the fabric so I could thread the elastic and wire through the casing I had created.
Another quick press to the new seam and then I turned it right side out.

The next step for this project was to install the wire to hold open the top to allow for easy bag disposal.

Of course the most accessible product for this was a wire hanger from the dry cleaner.
A pair of plyers and some wire snips later, and it was ready to go.
I threaded this into the top and then finished the seam to sew the sides together.
Then, I flipped it over and threaded a short piece of 1/4" wide elastic through the bottom. Again, I just finished the side seam.

A couple short seams to attach a hangar to the top (I used a fabric scrap from leftover from another project (it was about 2 1/2" by 12" and sewed into a tube finish the long edges)
and it was ready to fill and hang!!!!
So there you go. Another small project done for just a couple dollars!

Till the next project,
Lia
P.S. I put the final coat on my sewing chair today. Should be able to put it together and post a blog about it very soon!